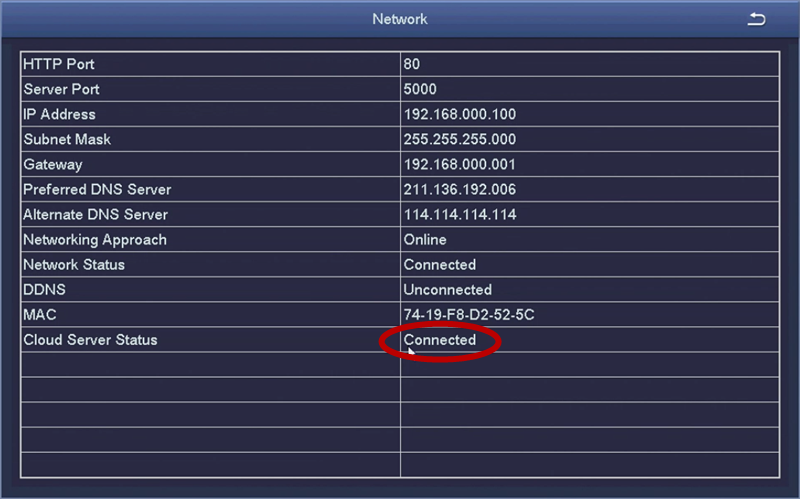
1. Right click mouse—go to Main Menu--Setup--Network.

2.Tick" Obtain an IP Address Automatically”.
3.Click"Test", if "OK" is displayed, the local area network is connected successfully.
NOTE:
Before that, make sure DHCP in your router has been open, the firewall was closed.
If "Unconnected" is displayed, please check internet circuit.
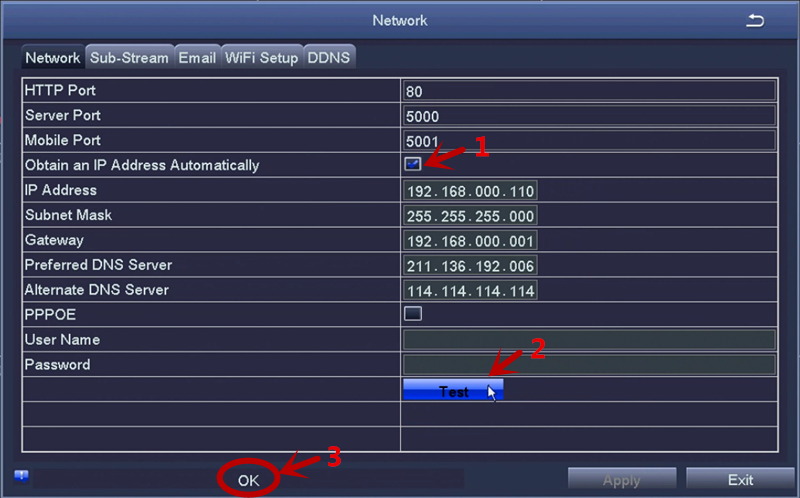
4.If the local area network connected successfully, back to Main Menu--Information--Network.

5.Check if the "Cloud Server Status" connected right. And if it shows "Connected", which means DVR is connected Internet successfully.
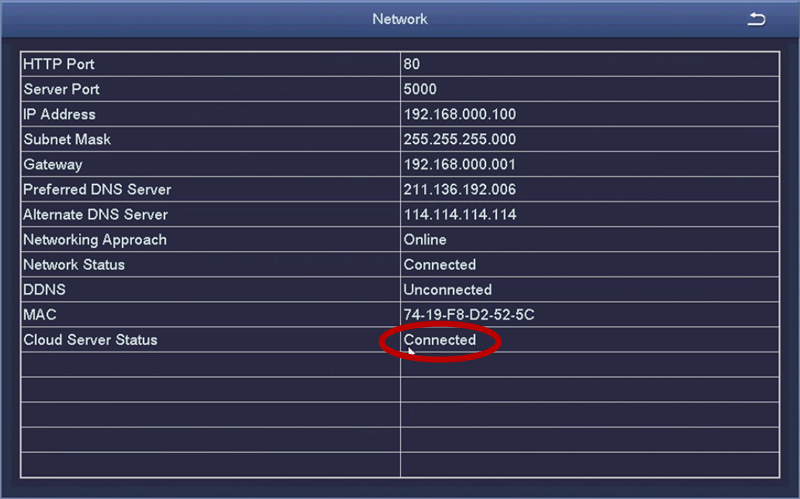
6.But if the "Cloud Server Status" shows "Unconnected", you have to exit this page and get into Main Menu--Setup--Network again.
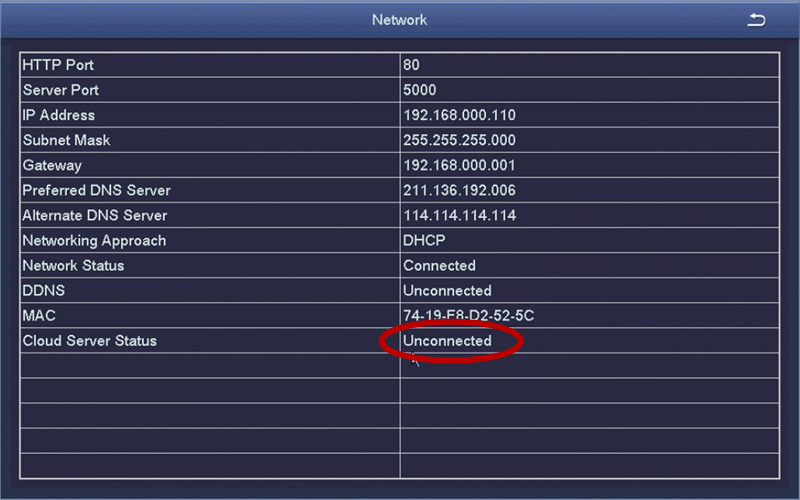

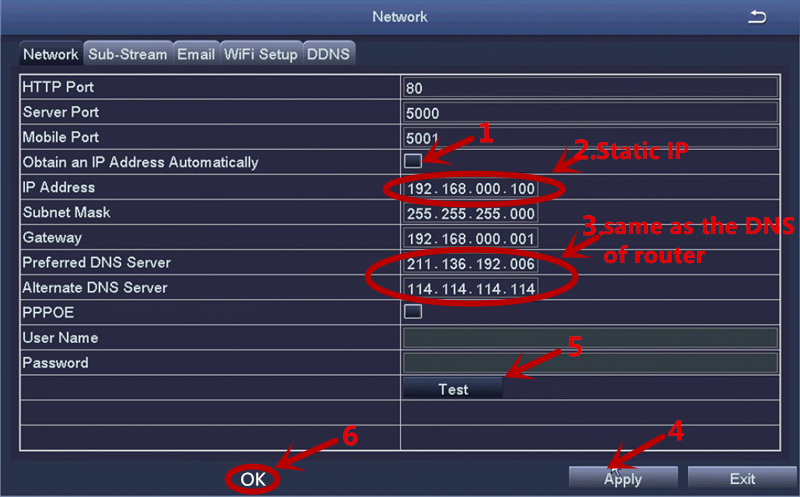
7.Cancel the "√" of the " Obtain an IP Address Automatically". Now, your DVR's IP is a static IP.
NOTE:
A. First, DVR's IP address you put in cannot be used by any other device, such as computer,
server, etc.
B. Second, Static IP address should be included in router’s IP address, beyond that, static IP is set
arbitrarily. For example, if router’s address is between 192.168.0.100 and 192.168.0.199,
static IP address should also be set between 192.168.0.100 and 192.168.0.199.
C. Third, the Subnet Mask and Gateway should be exactly like your router’s.
8. Make sure the DVR's "Preferred DNS Server " and "Alternate DNS Server " are both same with
router's "Preferred DNS Server" and "Alternate DNS Server".
9. Click "Apply” and "Test" .If "OK" is displayed, the local area network is connected successfully.
NOTE:
If "Unconnected" is displayed, please check internet circuit.
10. Since the local area network connected successfully, back to Main Menu--Information--Network.

11. Check if the "Cloud Server Status" connected right. If "Connected" is displayed, the DVR connected Internet successfully.
