Brand: |
none |
Address: |
China |
Min.Order: |
none |
Supply: |
none |
Valid until: |
Long Term |
Product Details
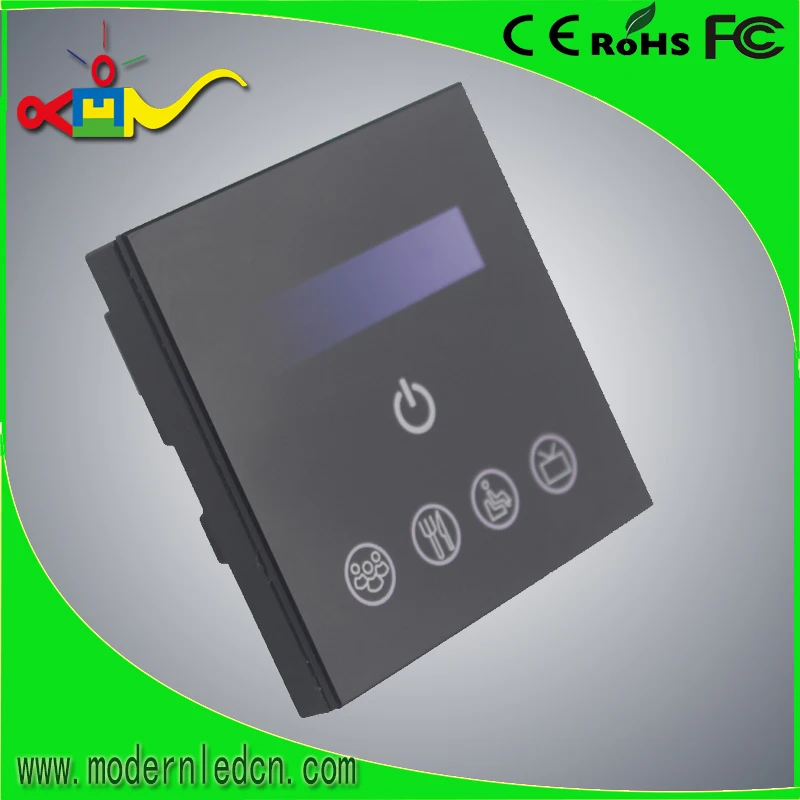
AC230V 86x86 wall mount triac touch led light 3000 watt dimmer switch


A. Product Summarization
TM113 is 0-10V dimmer independently developed by our company, which integrates WiFi dimming and 0-10V dimming. Dimming function of TM113 is more powerful, and more flexible to use. when using, you do not need to switch wireless networks, it is more convenient to be on internet. Upgrade software integration WiFiManager function makes network configuration of TM113 more convenient, you can independently choose wireless network just by mobile phone, no need to use the computer. Combined our independently developed mobile software Touchhome with controller, which makes TM113 more convenient to control. It adopts capacitive touch chips, achieves precise dimming, hardware layout is reasonable, can reduce trigger which caused by mistake. It provides more comfortable and convenient, safer intelligent lighting control than traditional lighting control, which gives user a new comfortable lighting environment.
B. Technical Parameters
1. Software technical parameters
1. Name: Touch Home+
2. Runtime platform: ios (iphone,ipad), Android (phone,pad) equipment must have WiFi function.
3. Language: English, Chinese
4. Category: communication
2. Touch panel dimmer technical parameters
1. Working voltage: AC90~240V / 50-60Hz
2. Working temperature: -20-60℃
3. Working power consumption: <3W
4. Dimming method: 0-10V signal output dimming
5. Output power: a: relay out AC90-240V/50-60Hz
b: Out analogy signal 0-10V
6. Max signal current: <15mA
7. External dimension: L86 * W86 * H37 (mm)
8. Packing size: L112 * W112 * H60 (mm)
3. External Dimension

C. Instruction for use
Step 1: Get to know WiFi touch panel dimmer
Step 2: Interface specifications
Step 2: Install TouchHome+ control software
Step 4: Configure touch panel dimmer
Step 5: Phone control
Step 6: Install touch panel dimmer
Step1:Get to know WiFi touch panel dimmer
The function of each button is as shown below:

: scene 1:
Long press: press the button for around 5s, store the current scene, light is on; in the case of opening buzzer, “didi” of buzzer, that has been stored the scene, release your hand, the corresponding LED will light; if the buzzer is off, long press for a while, then you can release your hand, the corresponding LED will light.
Short press: switch to stored scene, the button indicator pressed will light, when buzzer is on, you can hear “di” of buzzer.
: scene 2:
Long press: press the button for around 5s, store the current scene, light is on; in the case of opening buzzer, “didi” of buzzer, that has been stored the scene, release your hand, the corresponding LED will light; if the buzzer is off, long press for a while, then you can release your hand, the corresponding LED will light.
Short press: switch to stored scene, the button indicator pressed will light, when buzzer is on, you can hear “di” of buzzer.
: scene 3:
Long press: press the button for around 5s, store the current scene, light is on; in the case of opening buzzer, “didi” of buzzer, that has been stored the scene, release your hand, the corresponding LED will light; if the buzzer is off, long press for a while, then you can release your hand, the corresponding LED will light.
Short press: switch to stored scene, the button indicator pressed will light, when buzzer is on, you can hear “di” of buzzer.
: scene 4:
Long press: press the button for around 5s, store the current scene, light is on; in the case of opening buzzer, “didi” of buzzer, that has been stored the scene, release your hand, the corresponding LED will light; if the buzzer is off, long press for a while, then you can release your hand, the corresponding LED will light.
Short press: switch to stored scene, the button indicator pressed will light, when buzzer is on, you can hear “di” of buzzer.
: On/off switch. When controller switch is turned on, the backlight is off, operations of other keys are effective, it can perform operation of all functions. When controller is turned off, the backlight will light up, it can not perform the above operation, can only perform on/off switch
Long press the button around 5s: you can hear “di, di”, and then release the button, you can turn on/off the buzzer;
Long press the button around 10s: The buzzer will beep twice in fifth second, don't let go until tenth seconds,after the buzzer "drop, drop, drop" three sound, dimmer will restore the factory settings.
Step 2: Interface specifications
Step 3: Install control software of smartphone
1. IOS software installation
Method 1: iPhone or iPad App Store installation
Open iPhone or iPad App Store, input “TouchHome+” into search box, click “search” button, look for “TouchHome” software installation in the list, as shown below, click “installation”, the software will be installed in mobile phone.
Method 2: computer-based version iTunes installation
If the computer is not installed iTunes software, please download it from apple official website and install it. Open “iTunes” software, connect iPhone or iPad to computer via data line, input “TouchHome+” into search box, click “search” button, look for “TouchHome+” software installation in the list, as shown below, install it into mobile phone.
2. Android software installation
There are two cases:
The first: User devices support play store
Method one: phone or pad Play Store installation
Open “play store” in the phone or pad, input “TouchHome+” into search box,click “search” button, look for “TouchHome+” software installation in the list, install it into mobile phone, as shown in the figure.
Method two: computer installation
Open web browser, input website “play.google.com/store,” input “TouchHome+” into search box,click “search” button, look for “TouchHome+” software installation in the list, as shown below.
If user’s phones or pad has bound with user’s account, click “installation”, open mobile phone Play Store, software will autoload to download list. If not, user devices must adopt method one or method two to download software.
The second: User device don’t support Play Store
Open web browser, input website “http://apk.hiapk.com/”,input “TouchHome” into search box, click
“search” button, look for “TouchHome+” software installation in the list, as shown in the figure.
Step 4: Configure touch panel dimmer
Dimmer factory default parameter: mode: Ad hoc network (AP), SSID:TM113-XXXXXXXXXXXX, password : none. Configuring dimmer mobile phone should be installed “TouchHome+” dimmer software.
Steps of configuring dimmer:
1. Restore factory settings
Press “ON/OFF”for 5s, you can hear “di, di, di” of buzzer. Dimmer restores factory settings, at this moment, type of network is mode: Ad hoc network (AP), SSID:TM113-XXXXXXXXXXXX, password : none. If it is factory default, the step can be omitted, directly enter into step 2.
2. Mobile phone joins the dimmer wireless network(SSID: TM113-XXXXXXXXXXXX, password: none)
Open mobile phone WiFi, search “TM113-XXXXXXXXXXXX”, join it, as shown below:
3. Setting network
Open “TouchHome+”, click “more”, open the page as shown below, choose the equipment which need to be modified, input the network information you need to add, click “send”, then the dimmer network setting is finished.
Page description:
1. Refresh: If the equipment is not refreshed automatically, click the key, then you can refresh equipment manually.
2. Device list: show current equipment connected to this router, the blue circle indicates being chosen.
3. Account: The router SSID you need to add.
4. Password: The router password you need to add.
5. Send: Determine the key.
4. Test dimmer
Add the mobile phone to the router in which dimmer joins, open the page on step 3, click “refresh”, check whether dimmer has joined in this router or not, if you can inquiry equipment in device list, it shows that the device settings are successful. Otherwise, reset from step 1.

Step 5: Phone control
Open “TouchHome”, click “area”, add room->add equipment->control equipment. Click added equipment,enter into the page as shown below.
Page description:
1. Drawer slip: brightness adjusts the drawer slip.
2. Open: open dimmer output.
3. : increase the brightness, each click will increase the brightness 1, long press increases the brightness continuously.
4. :decrease the brightness, each click will decrease the brightness 1, long press decreases the brightness continuously.
5. Close: close dimmer output.
FAQ:
1. How To Order ?
A: Step 1, please tell us what model and quantity you need;
Step 2, then we will make a PI for you to confirm the order details;
Step 3, when we confirmed everything, can arrange the payment;
Step 4, finally we deliver the goods within the stipulated time.
2 . Q: When will make delivery ?
A: Delivery Time
-Sample Order: 1-3 days after receipt of the full payment.
-Stock Order: 3-7days after receipt of the full payment
-OEM Order: 12-20days after receipt of the deposit.
3. After-sales Service 2 year warranty for all kinds of products;
If you find any defective accessories first time, we will give you the new parts for free to replace in the next order, as an experienced manufacturer, you can rest assured of the quality and after-sales service.
4.Payment T/T, Western Union, L/C.
5. Transportation Transported by DHL, UPS, EMS, Fedex, Air freight. sea freight.
6. Do you support drop shipping? Yes, your drop shipping is available.
7. Is it OK to print my logo on led light product?
A: Yes. Please inform us formally before our production and confirm the design firstly based on mass production after test sample well
8. How to deal with the faulty?
A: Firstly, Our products are produced in strict quality control system and the defective rate will be less
than 0.2%.
Secondly, during the guarantee period, we will send new lights with new order for small quantity. For
defective batch products, we will repair them and resend them to you or we can discuss the solution including re-call according to real situation.



 Share
Share











Customer Reviews total 0 items